Create Service Connectivity Policy
Preparation
To set up the service connectivity policy in your service interconnection fabric you will need an access to the fabric manager and the policy orchestrator.
All the tasks presented in this tutorial can be accomplished using either orchestrator Web-interface or BWCTL-API command-line tool. The tutorial shows how to perform them in BWCTL-API CLI.
Note
This tutorial will take approximately 10 minutes to complete.
Upload Communication Rules
You can program your own communication rules using the policy orchestrator SDK or start with a default set of rules coming with BWCTL-API tool. To upload the default set of rules, run this command:
]$ bwctl-api create template default
You should see this output:
[2019-09-26 19:41:53.528] Template 'default' created successfully
Create Service Graph
Create Domain
To create a namespace for your application policy, run this command with a
desired domain name (any string without spaces)–in this example myapp as an
argument:
]$ bwctl-api create domain myapp
You should see output similar to this:
[2019-09-26 19:42:38.726] Domain 'myapp' created successfully
Specify Contract
To specify a security segment in the newly created namespace, run this command
with a desired contract name (any string without spaces) preceding the domain
name–in this example frontend@myapp as an argument:
]$ bwctl-api create contract frontend@myapp
You should see output similar to this:
[2019-09-26 19:43:13.294] Contract 'frontend@myapp' created successfully
Name Service
To name a service in the newly created namespace, run this command with a
desired service name (any string without spaces) preceding the domain name–in
this example http-proxy@myapp as an argument:
]$ bwctl-api create service http-proxy@myapp
You should see this output:
[2019-09-26 19:43:45.779] Service 'http-proxy@myapp' created successfully
Authorize Service
To authorize the newly created service to access the security segment, you have to assign the service a role in the contract.
To check available roles, run this command with the contract name–in this
example frontend@myapp as an argument:
]$ bwctl-api show contract frontend@myapp
You should see output similar to this:
---
apiVersion: policy.bayware.io/v1
kind: Contract
metadata:
  description: frontend
  domain: myapp
  name: frontend
spec:
 contract_roles:
 - cfg_hash: c40f2ddc0843e983a4ea4088e2ea0f8e
   description: null
   id: 1
   ingress_rules:
   - {}
   name: originator
   path_params: {}
   port_mirror_enabled: false
   program_data:
     params:
     - name: hopsCount
       value: 0
     ppl: 0
   propagation_interval: 5
   role_index: 0
   service_rdn: originator.frontend.myapp
   stat_enabled: false
 - cfg_hash: 84dcec61d02bb315a50354e38b1e6a0a
   description: null
   id: 2
   ingress_rules:
   - {}
   name: responder
   path_params: {}
   port_mirror_enabled: false
   program_data:
     params:
     - name: hopsCount
       value: 0
     ppl: 0
   propagation_interval: 5
   role_index: 1
   service_rdn: responder.frontend.myapp
   stat_enabled: false
 enabled: true
 template: default
Note
The contract specification always includes two roles. A unique role identifier is built using such notation – <role_name>:<contract_name>.
To assign a contract role to the service, run this command with the service
name and the contract role–in this example originator:frontend as an argument:
]$ bwctl-api update service http-proxy@myapp -a originator:frontend
You should see output similar to this:
[2019-09-26 19:44:23.626] Service 'http-proxy@myapp' updated successfully
To verify that your application policy is now in place, go to orchestrator, select your application domain and click on Service Graph.
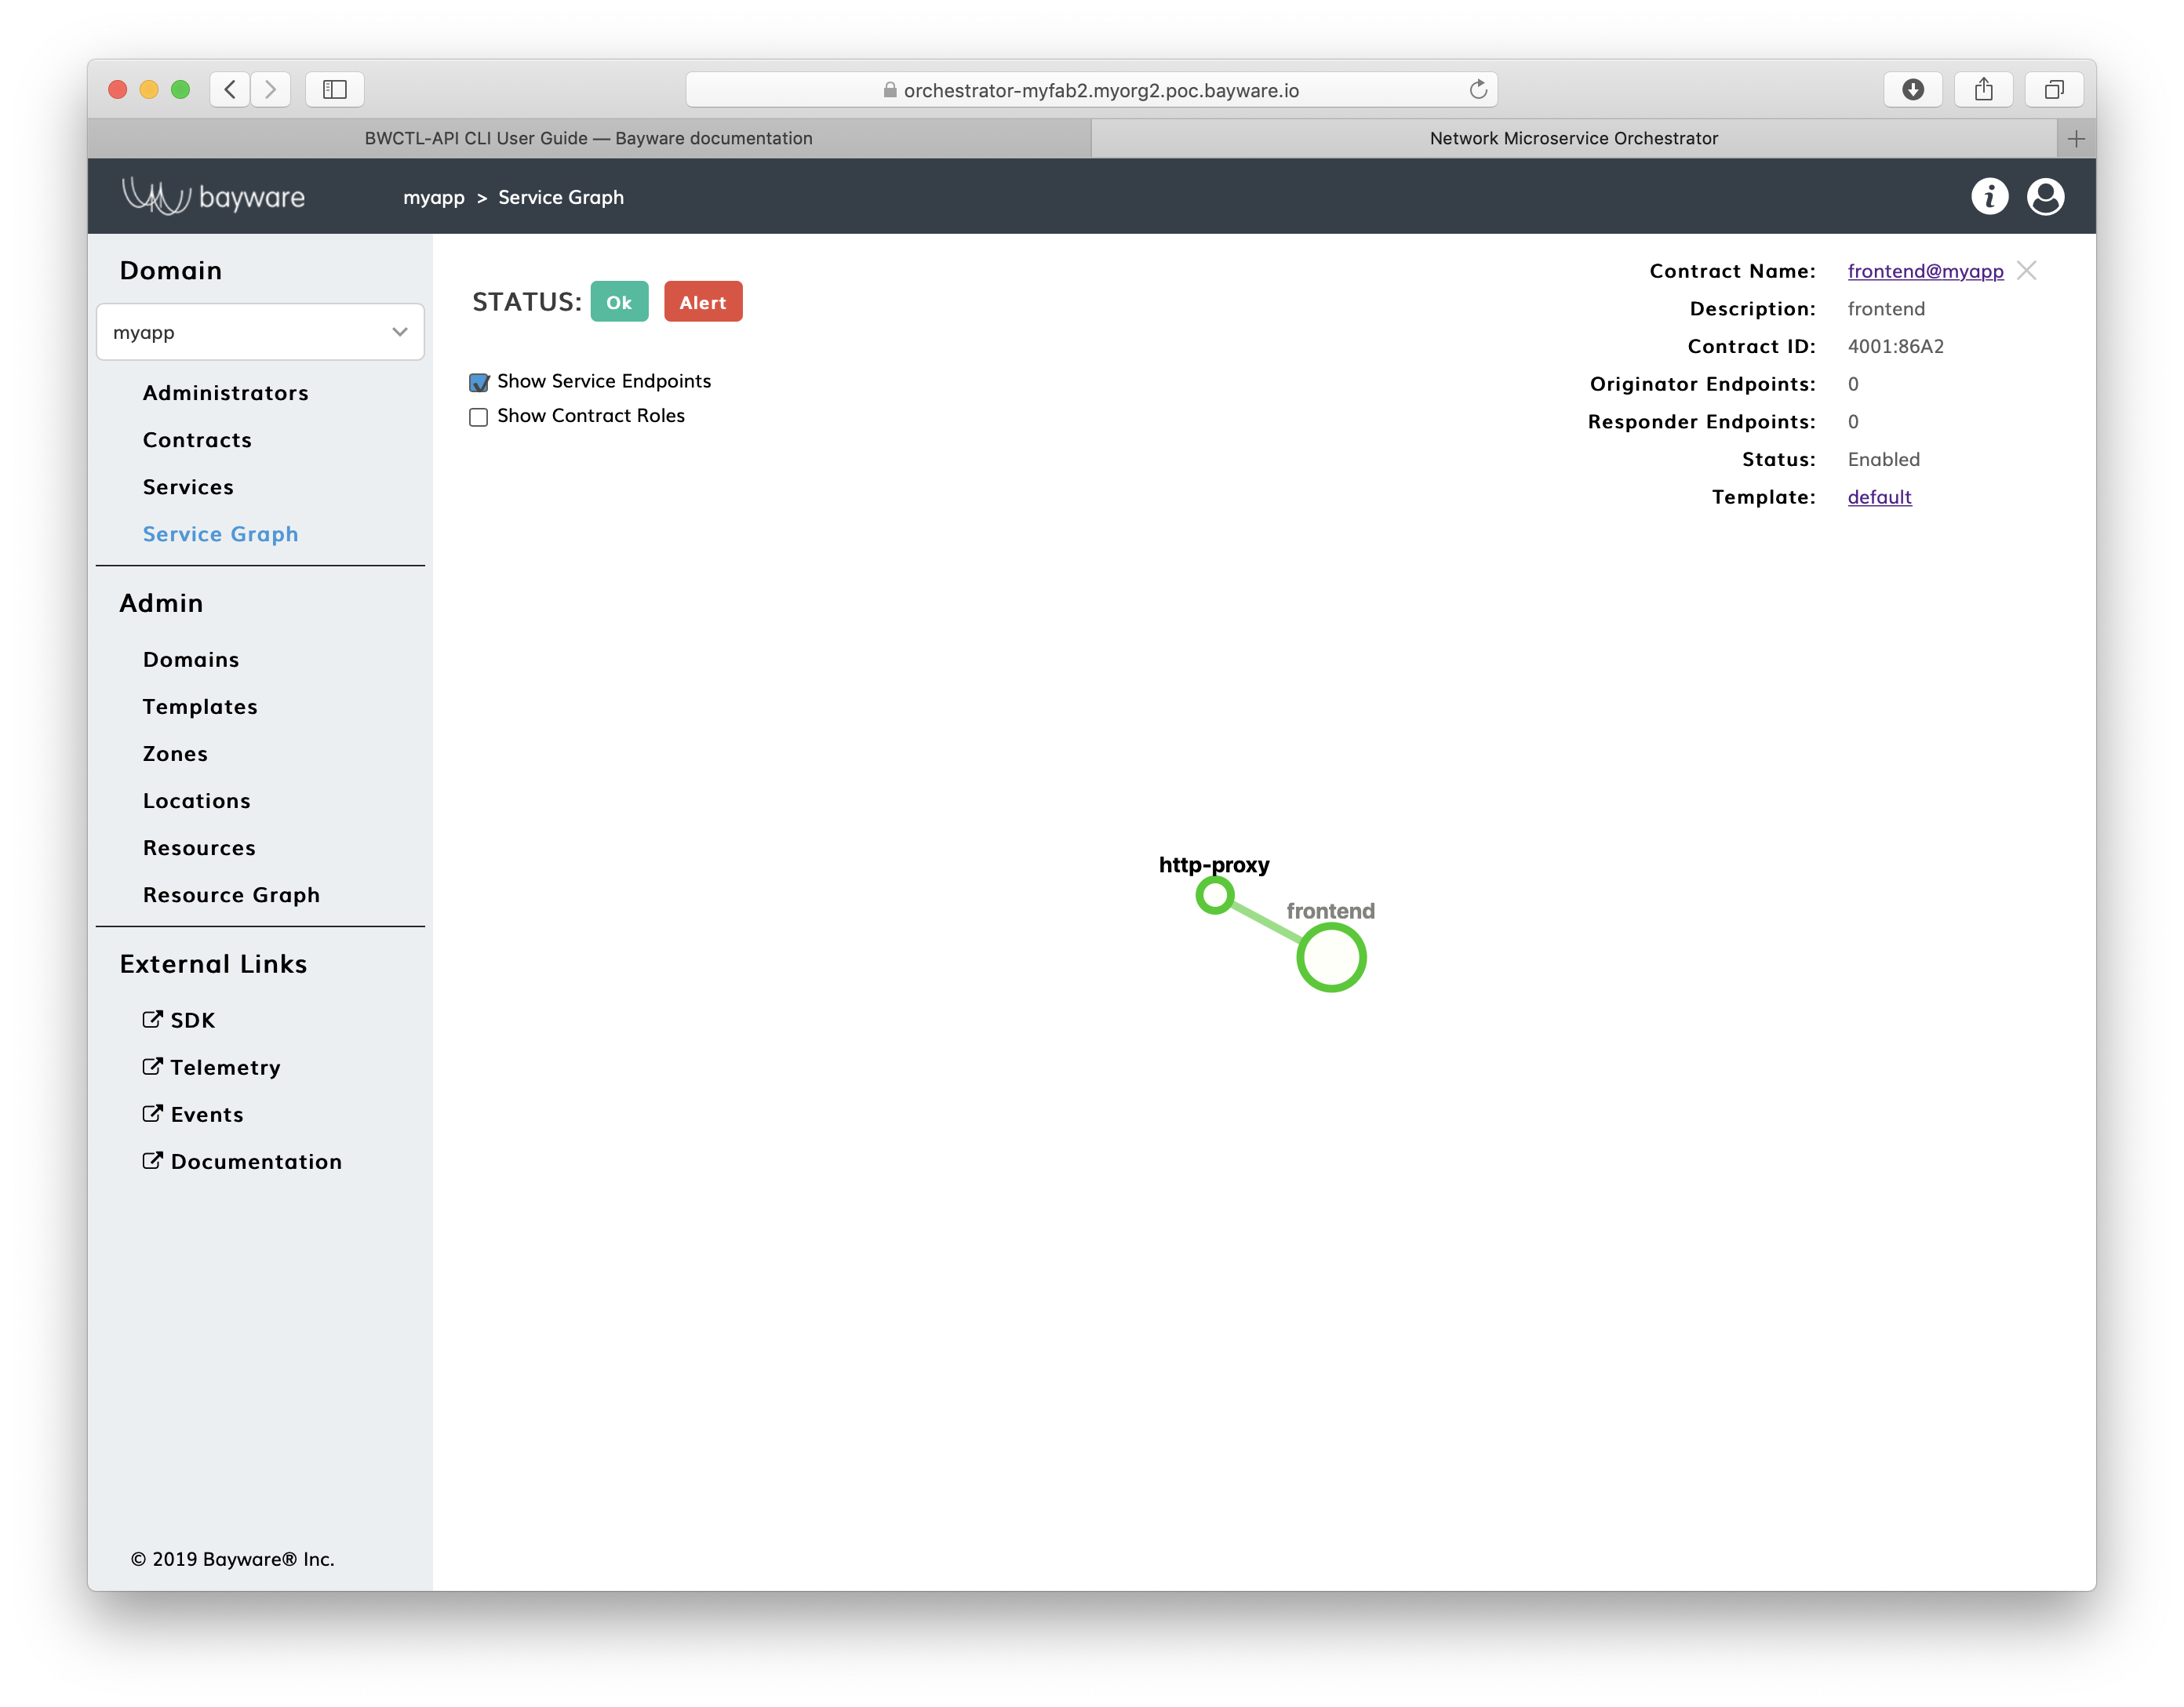
Fig. 14 Fig. Application Service Graph Page
Summary
Review Steps
You now have set up an infrastructure-agnostic segmentation policy for your application.
Firstly, you uploaded a template that implements default communication rules of interaction between application services in multi-cloud environment.
Secondly, you created a security segment–called contract using the template and specified that one of your application services is authorized to access this segment in a particular role.
Next Step
At the final step, you will deploy authorized application services on workload nodes in your service interconnection fabric.
No changes to application code, no proxies in between, and no network configuration is needed. Just install existing packages alongside with service authorization tokens and you will automatically receive multicloud secure segmentation, service discovery, and on-the-fly traffic rerouting for disaster recovery and cost optimization.